At the end of April, there were many sensational news about farming a new coin that can be mined using hard drives, which instantly caused a shortage of SSD, NVMe, and HDD disks.
What is Chia Coin and how to set up coin farming?
To begin with, Chia Network is a new blockchain and smart transaction platform that is more efficient, decentralized, and secure. Created by BitTorrent inventor Bram Cohen based on the cryptographic Proof of Space method, it will replace energy-intensive proofs-of-work.
Chia farming – is it promising, you ask me? I’ll say – YES, it is very, very promising and it may make you a millionaire.
The decision is yours alone.
We and our team decided to test and see the entire Chia Coin farming process in practice. We launched a couple of servers in the Server.UA data center, one on an SSD disk and the other on NVMe disks – this will help us understand which option is better to choose.
Server configurations:
Server 1 – 2 CPUs (24 cores) / 8-16GB RAM / 1 TB SSD
Server 2 – 2 CPUs (24 cores) / 64 GB RAM / 4 TB NVMe
We loaded the storage with a 2x10Gbit/s network and allocated 24 TB HDD volume.
We prepared the servers before installing Chia by installing the latest version of Ubuntu operating system with a graphical interface and VNC access. The servers are ready, and now we can proceed with the installation of Chia. The installation process is very simple and you do not need any advanced administration skills.
Other operating systems like MacOS, Windows, CentOS, Debian are also suitable for installing Chia. The installation instructions are available on the official website.
To start, we need to access the server using VNC.


Open a terminal window and work as a regular user, not as root.
Update the software:
sudo apt-get update
sudo apt-get upgrade -y
Install Git:
sudo apt install git -y
Check the source and install:
git clone https://github.com/Chia-Network/chia-blockchain.git -b latest –recurse-submodules
cd chia-blockchain
sh install.sh
. ./activate
Install the graphical user interface:
To use the graphical user interface, you need to have Ubuntu Desktop or a similar window system installed. You cannot install and run the GUI as the root user.
sh install-gui.sh
cd chia-blockchain-gui
npm run electron &
At this stage, we have completed the installation, congratulations! Now simply launch the program and it will start synchronizing with the Chia blockchain, which may take 3-6 hours.
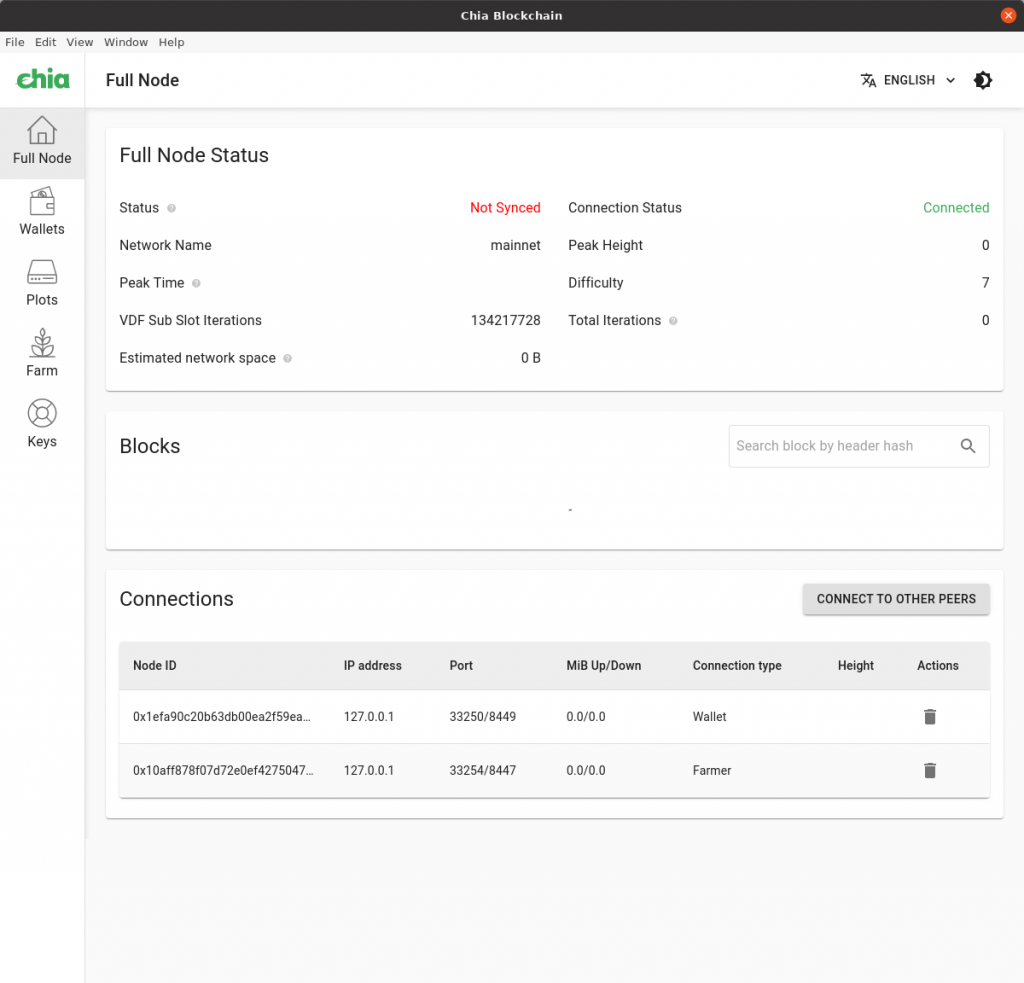
I want to draw your attention to the fact that for your convenience, you can choose the language of the program interface, for example, Russian.
In the future, we will need to create a plot.
Go to the Plots tab and click the Add a plot button:
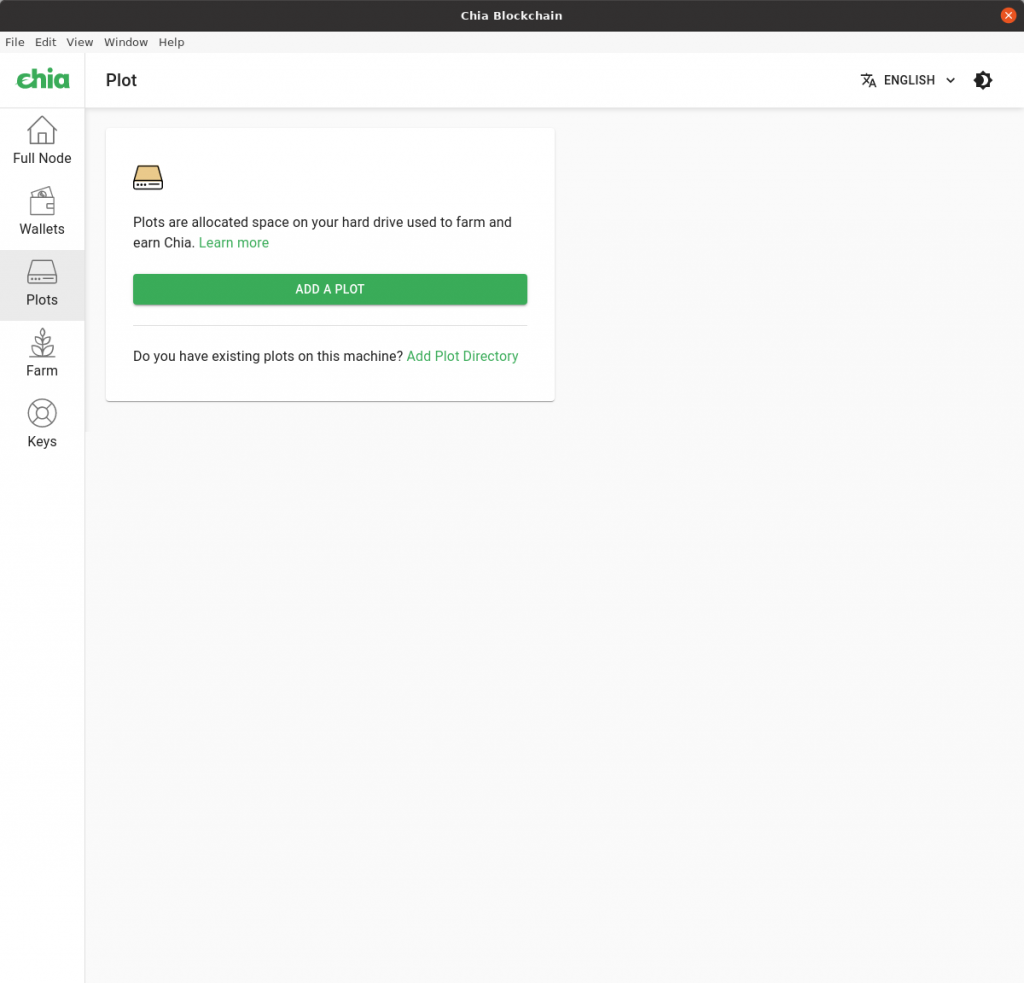
After that, you will see a window with various parameters that need to be filled in depending on the server’s power you have chosen:
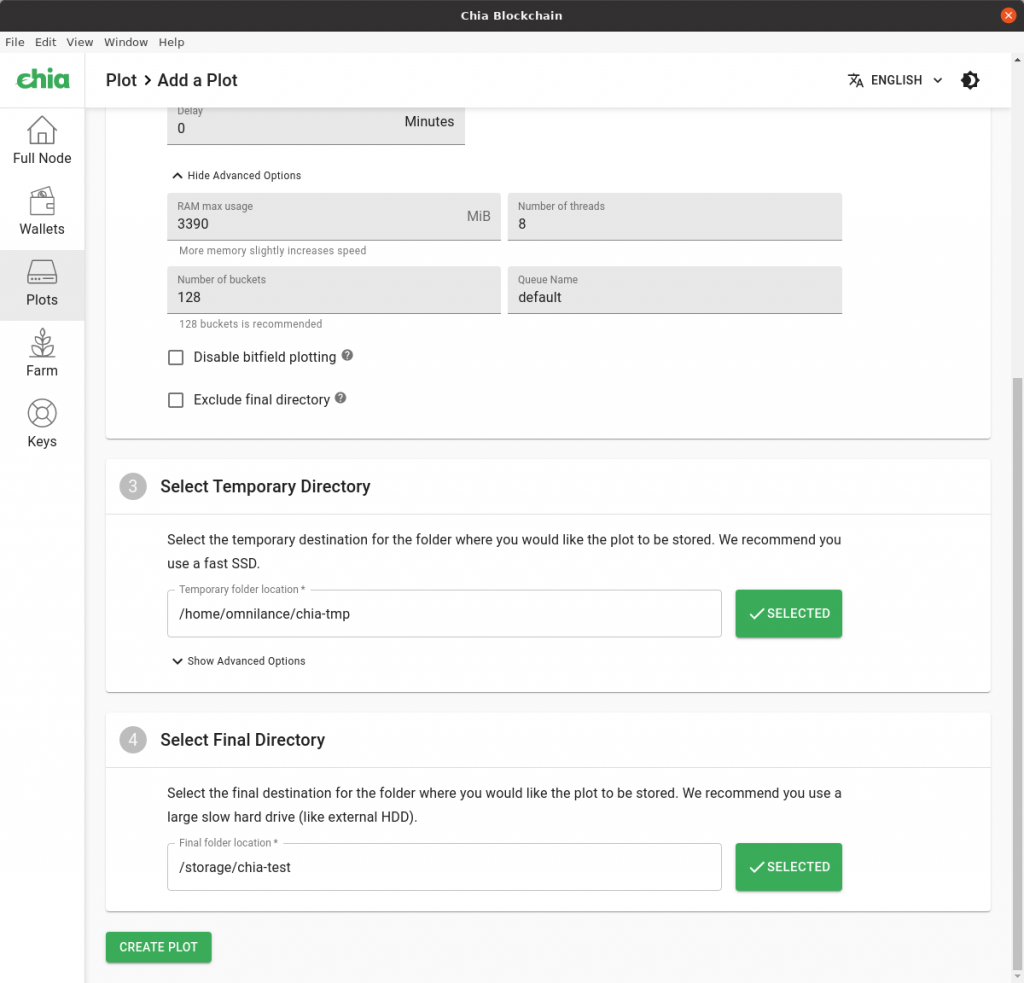
More about the parameters:
Choose Plot Size. According to the recommendation on the chia.net website, the plot size should be selected as k=32, which is 101.4 GiB (109 Gb). You can find more information on their website if you want to make other changes.
Choose Number of Plots. This parameter specifies how many plots will be created simultaneously. To create one plot, 256 GB of disk space will be temporarily occupied. Therefore, you need to have a free SSD/NVMe disk with such space to be able to create one plot. For testing, we took an SSD of 1 TB on one server and selected two or three plots. Plotting requires powerful processors, so you need to calculate this parameter based on your own specifications. The more cores you have, the faster the plots will be created. You can also edit additional options/Advanced Option and specify how many cores to use for plotting.
Select Temporary Directory. Here we specify our SSD disk on which temporary files of 256 GB will be created. After the plot is created, all temporary files will be automatically erased. If any problem occurs, such as a power outage, you need to delete all temporary files from the directory and start the process again.
Select Final Directory. This is where the plot(s) will be stored. Here, you need to specify your HDD storage, not SSD or NVMe. In our case, we made it a network storage by connecting it with two 10 Gbit/s optical cables for fast file transfer speeds.
After filling in all the necessary parameters, you can wait for the plotting process to complete.


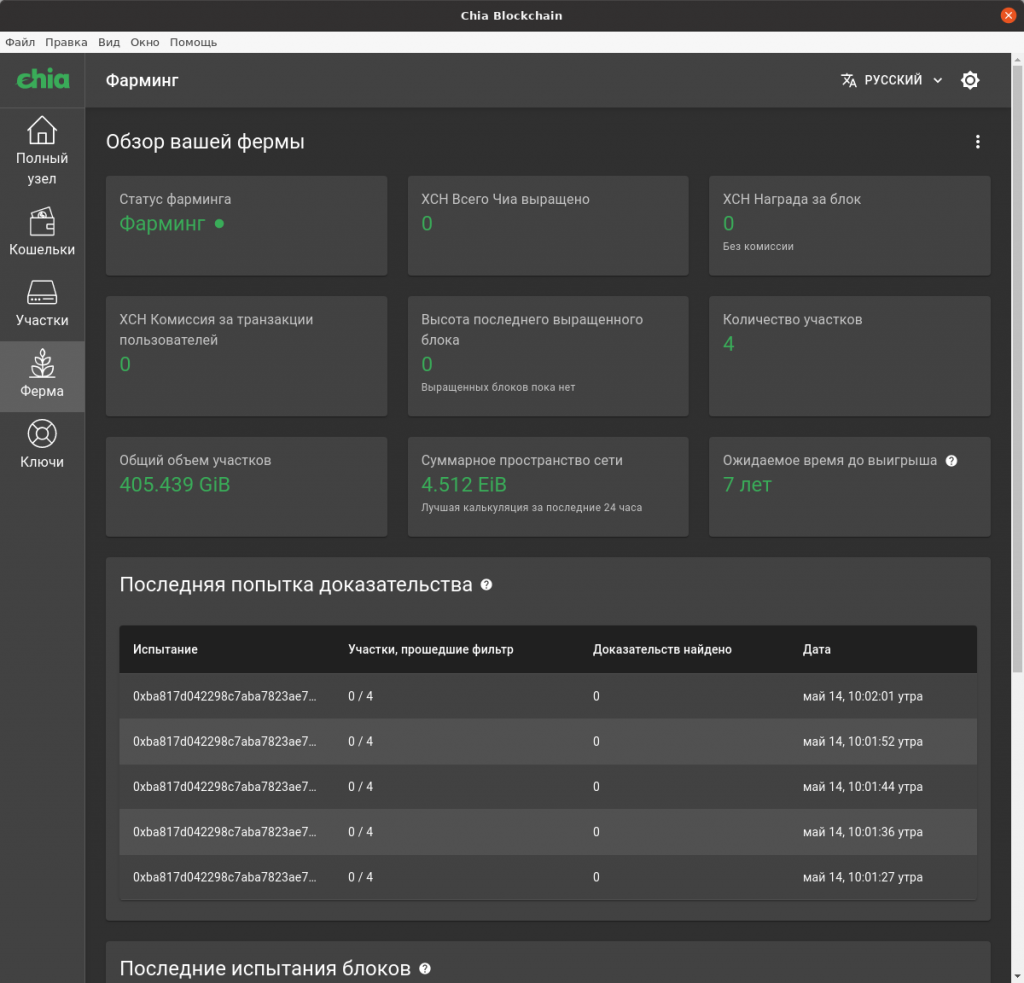
After at least one plot is created, synchronization will begin and farming will start automatically.
That’s basically it, now make your own conclusions and start earning.

It is important to pay attention to the message in the bottom right corner: Estimated Time to Win: 9 years. This means that the approximate time to win and earn one Chia coin is 9 years with three plots. The more plots you have, the faster it will be. Adding a few more plots reduced the time to 7 years.

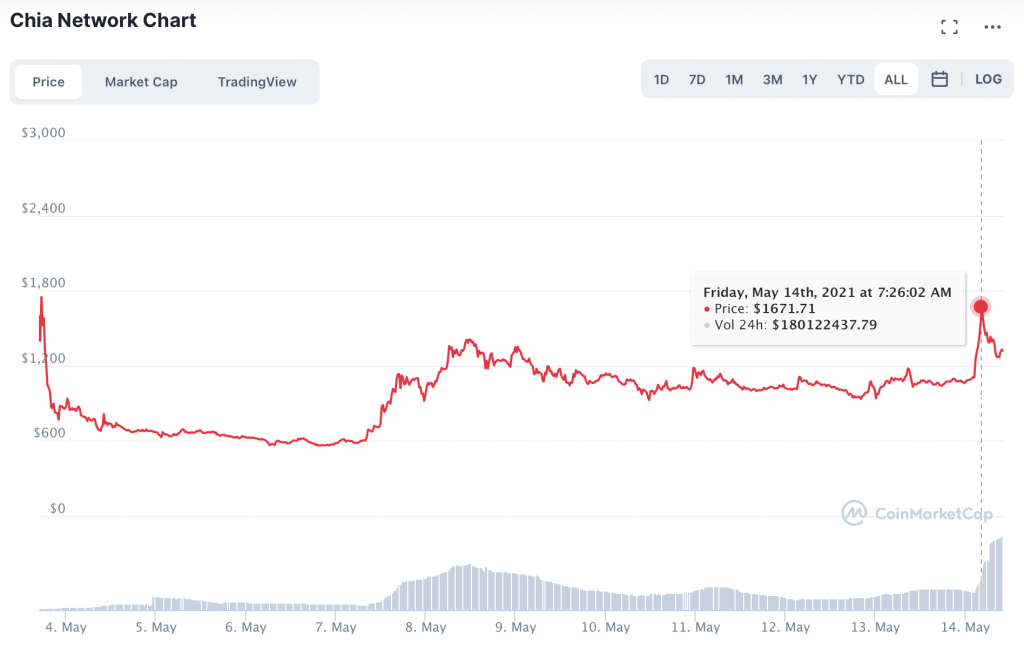
What is the price of CHIA?
Leave a Reply